On this page
Devflair Docs
Devflair is the marketing workspace for indie devs. Connect your app stores once, then optimize listings, respond to reviews, draft launch announcements from releases, and publish across X, Bluesky, LinkedIn, Mastodon and Threads — all from one place.

ASO Suite
AI-generated descriptions, keywords, subtitles, promo text — pushed straight to ASC/Play.
Screenshot Studio
One upload, all device sizes. Multi-device layout + direct ASC upload.
Reviews AI
Suggested replies for every new review, tone-matched to your product.
Release Drafts
GitHub releases auto-draft social posts. Tag a product, we write the launch.
Automations
Status changes, milestones, and reviews trigger drafts without lifting a finger.
Multi-platform publish
Post to 5 networks with one click — X, Bluesky, LinkedIn, Mastodon, Threads.
Quick Start#
From zero to App Store optimization — or GitHub release drafting — in about 10 minutes.
- 1
Create your account
Sign up at devflair.xyz with email + password. You'll be dropped into onboarding.
- 2
Pick a category
Mobile apps, desktop, games, web/SaaS, open source, digital products, or creator. This decides which integrations appear in your workspace.
- 3
Create your first product
Name, tagline, audience, URL. This feeds the AI context for every generation you run.
- 4
Connect an integration
From the Integrations Hub: App Store Connect (.p8 key), GitHub App (install on your repos), or Google Play (service account JSON).
- 5
Run your first workflow
iOS → go to ASO Suite, generate a new description, push it to App Store Connect. OSS → watch GitHub release drafts land in /releases.
You can connect multiple integrations, but on Free/Solo plans they must share the same category (e.g. iOS + Android = both “mobile”, fine). Mixing categories requires Team.
Products#
A “product” is whatever you’re marketing — an app, a game, an npm package, a newsletter. Every AI generation you run pulls from the product’s context (name, tagline, audience, notes) so the output sounds like your product.
Creating a product#
During onboarding you create your first product. To add more, go to Projects in the nav. Free plan = 1 product. Solo = 3. Team = 10.
Product context & AI quality#
The Context field accepts free-form notes. Paste in:
- Key features, audience, differentiators
- Voice/tone guidelines (“casual, no emojis, developer-first”)
- Brand dos and don’ts
- Competitor positioning
The more context you provide, the less you’ll edit AI output. 400-800 words is a sweet spot.
Linking stores + repos#
Products are automatically linked when you connect an integration: ASC apps seed iOS products, Play packages seed Android products. For OSS, go to the connected GitHub tile in Integrations and attach a repo to your product there.
Integrations Hub#
One place to connect every platform you ship on. Lives at Settings → Integrations.
Live integrations#
iOS/iPadOS/macOS. Upload a .p8 API key. Unlocks ASO Suite, Screenshot Studio (iPhone + iPad), Reviews AI, submit/release pipeline.
Install the Devflair App on your repos. Release events auto-draft social posts in /releases.
Android apps. Service account JSON + package names. Unlocks Play ASO, screenshot push, reviews (last 7 days).
On the roadmap#
Steam and Epic land Q3 2026. Microsoft Store, Gumroad, Lemon Squeezy, and Product Hunt land Q4 2026. See the full public roadmap.
Category gates#
Free and Solo plans cap you at one category — iOS + Android works (both “mobile”), but iOS + OSS would be two categories. Mixing categories requires Team. This keeps smaller plans focused and prevents Devflair from becoming a cross-everything subscription creep.
Apps Dashboard#
Once ASC or Play is connected, the Apps page pulls live data for every app the integration has access to.
Each card shows:
- App icon, name, bundle ID
- Current version state (READY_FOR_SALE, PREPARE_FOR_SUBMISSION, etc.)
- 7-day install count and impressions (where analytics are available)
- Rating + review count
- Per-app quick-links to ASO Suite, Screenshots, Reviews for that app
Enabling analytics#
ASC analytics aren’t on by default — click Enable Analytics on a card to have Apple start producing daily reports. First data arrives 24–48h later. Play analytics require enabling BigQuery export in Play Console (not wrapped by Devflair — manual setup).
ASO Suite#
AI-generated App Store copy that you can push directly to App Store Connect or Google Play — no copy/paste, no download/reupload. solo required for push; generation works on Free.
Fields Devflair writes#
The long body. Lead with the hook that's converting best for your funnel.
Comma-separated. Don't repeat your app name — Apple indexes it automatically.
iOS only. Benefit-focused one-liner.
Release notes. Auto-drafted when version hits PREPARE_FOR_SUBMISSION.
iOS only. Updates anytime without a new review — use for campaigns.
Play Console app title.
Editable entries + AI generate#
Every field has both a plain editable box (for your own copy) and a Generate with AI button. Generated output drops into the same box — you can accept, tweak, or regenerate. Nothing hits the App Store until you click Push to App Store.
Pushing to stores#
When you click Push:
- Devflair finds the editable version (creates one if the latest is live)
- Writes your change via the ASC or Play API
- Returns the updated value from the store as confirmation
- Records the push in your ASO changelog (for impact tracking)
Promotional Text on iOS updates instantly. Other fields take effect with your next version. Play commits use changesNotSentForReview: true — you control the review submission separately.
Screenshot Studio#
One upload, all device sizes, direct ASC upload. Lives at /screenshots.
Multi-device output#
Upload your raw screenshots once. Devflair detects the aspect ratio and filters the device picker to compatible sizes. Current presets:
- iPhone 6.9” (APP_IPHONE_69) — 1320×2868, iPhone 16 Pro Max
- iPhone 6.7” (APP_IPHONE_67) — 1290×2796, iPhone 15 Pro Max
- iPhone 6.5” (APP_IPHONE_65) — 1284×2778
- iPhone 5.5” (APP_IPHONE_55) — 1242×2208, SE/legacy
- iPad Pro 13” (APP_IPAD_PRO_3GEN_129) — 2064×2752
- iPad Pro 12.9” (APP_IPAD_PRO_129) — 2048×2732
Templates + AI layout#
Pick a visual template (Glass, Editorial, Terminal, Gradient Flow, Clean, Neon) or let AI compose a layout from your screenshots. Layouts use normalized coordinates so a single design renders at every target resolution without distortion.
Direct upload to App Store#
When you’re happy, click Push to App Store (or Play). Devflair signs an ASC JWT, creates screenshot sets per device, uploads each render, and commits. No downloading PNGs and re-uploading to App Store Connect.
Batch uploads preserve the full set — we no longer wipe previous files per screenshot. Only the device’s complete set is replaced atomically at commit.
Reviews AI#
The Reviews page pulls recent reviews from every connected app and generates tone-matched reply suggestions.
Where reviews come from#
- iOS: iTunes RSS feed per territory — public, no auth, ~20 req/min. All history available.
- Android: Play Developer API — last 7 days only. Older reviews require BigQuery export.
AI-suggested replies#
Low ratings (1–3★) get 3 suggested replies — empathetic, action-oriented, and brief. Tone adapts to your product context. High ratings (4–5★) get a “Turn into social proof” button that drafts a quote-post.
Play replies are capped at 350 chars (Play Store limit). Devflair enforces the limit before submit.
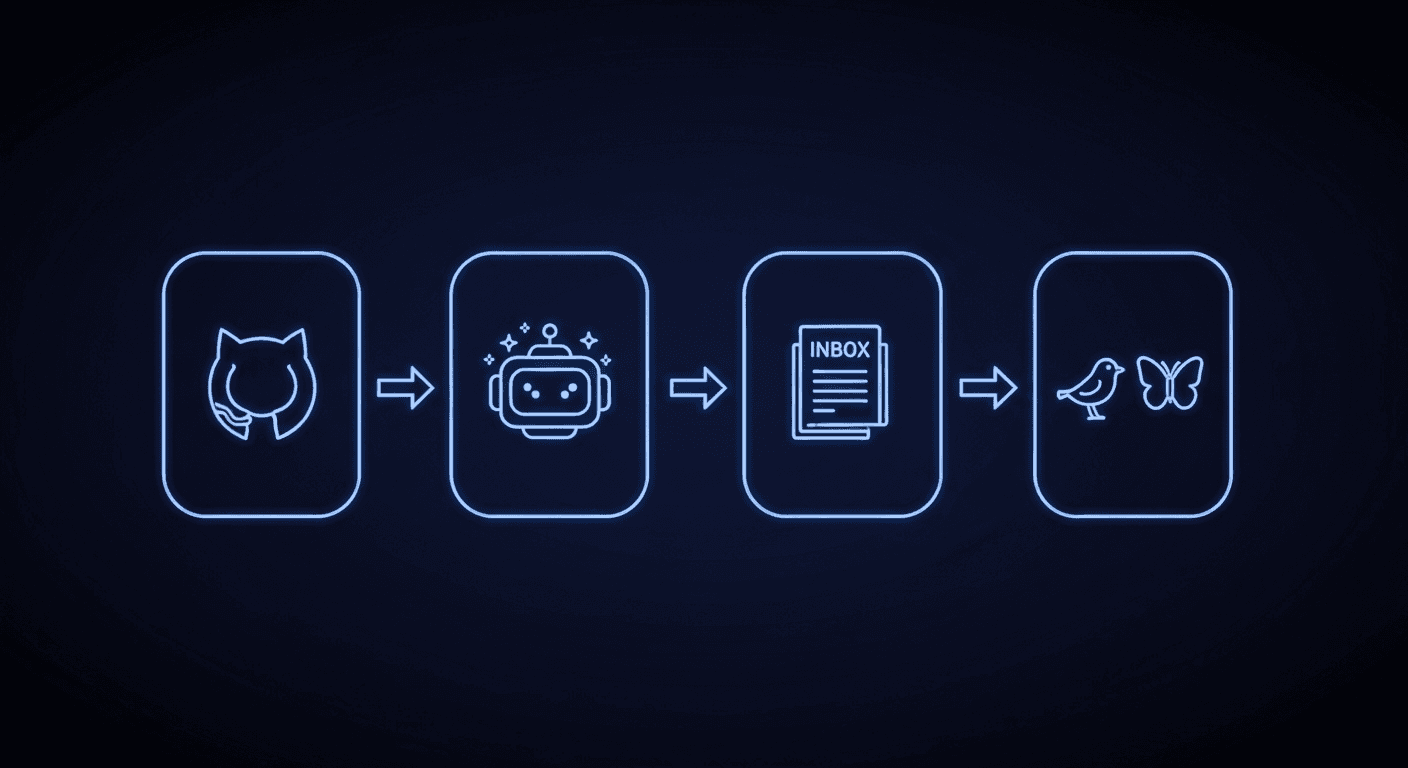
Release Drafts#
When you publish a GitHub release, Devflair auto-creates a draft social post. Lives at /releases. solo required.
- 1
Install the GitHub App
From Integrations Hub → GitHub → Install on GitHub. Pick the org + repos you want Devflair to watch.
- 2
Link each product to a repo
In the connected GitHub tile, expand "Manage repos" and pick the repo for each product. Links can be changed later.
- 3
Publish a release
git tag + push. When GitHub marks the release as published, Devflair receives a webhook within seconds.
- 4
Edit the draft in /releases
A draft lands with a plain initial summary. Click "Enhance with AI" to flesh it out using your product context and release notes.
- 5
Publish to socials
One click publishes across your connected social accounts.
Manual release import#
Not using GitHub? Paste a release URL in /releases → Manual Import. Devflair fetches the notes and generates a draft the same way.
Connecting Social Accounts#
Devflair publishes to X, Bluesky, LinkedIn, Mastodon, and Threads. Each is BYOK (Bring Your Own Keys) — credentials are encrypted with AES-256-GCM at rest. Configure under Settings → Social Accounts.
X (Twitter)#
Create a project at developer.x.com. Get Consumer Keys + OAuth 1.0a user access tokens (Read+Write). Paste all four into Devflair.
Bluesky#
Create an App Password in Bluesky Settings → App Passwords. Paste your handle (e.g. you.bsky.social) + the app password.
LinkedIn, Mastodon, Threads#
LinkedIn uses OAuth (click Connect). Mastodon needs your instance URL + an application access token. Threads uses Meta’s Graph API — paste token + user ID.
AI Keys & Model Selection#
Devflair uses AI for ASO generation, post drafting, review replies, and layout composition. Everything is BYOK — supported providers: Anthropic (Claude), OpenAI (GPT), Google (Gemini).
Included by plan#
- free — BYOK only. Supply your own provider key.
- solo — Includes Claude Haiku. No key needed to start.
- ✦ team — Includes Claude Sonnet. Higher-quality output for all AI features.
Adding a key#
Go to Settings → AI Keys, paste your provider key, pick a preferred provider, and click Save. After the first save you can also choose a specific model (e.g. claude-haiku-4-5).
Keys are encrypted (AES-256-GCM) and never returned by the API or UI after save — we only show “✓ saved”. Rotate by pasting a new one.
Compose & Post#
Smart Compose is status-aware — when an app event fires, compose pre-populates with contextual copy. You can also start a draft from scratch.
Selecting platforms#
Tick the platforms at the top of Compose. Devflair auto-checks character counts against each platform’s limit (X: 280, LinkedIn: 3000, Bluesky: 300, Mastodon: 500, Threads: 500) and warns before you exceed.
Drafting with AI#
Type a few bullet-style notes, pick a product (for context), click Draft. The AI writes a platform-appropriate post. Edit inline or click Regenerate for a new variation.
Link enrichment#
Paste a URL in the notes and Devflair fetches the page meta (title, description, og:image) to ground the AI in what the link is actually about.
Adding media#
Attach images from your device or from your product’s saved image library. Images upload to the same storage bucket used by Screenshot Studio and are cleaned up after 30 days.
Saving & loading drafts#
Drafts auto-save as you type. Reload later from the Drafts sidebar. Closed tabs don’t lose work.
Threads#
Multi-post threads work on X, Bluesky, and Threads. Toggle Thread mode in Compose or use the Split into thread AI tool to break a long draft into platform-safe chunks (with 1/N numbering).
Scheduling & Calendar#
Solo plan and above. Schedule posts for later — a cron fires every 5 minutes and posts anything whose scheduled time has passed.
Scheduling a post#
From Compose, click the clock icon next to Publish → pick a date/time → Save to queue. Times are stored in UTC; the UI shows them in your local zone.
Queue management#
/queue lists everything pending. Edit content, reschedule, or cancel. Failed posts show the platform error and let you retry after fixing credentials.
Calendar view#
/calendar is the visual month/week/day view. Drag posts to reschedule.
Campaign Studio#
✦ team Plan a multi-day launch — AI generates a sequence of posts across platforms with staggered times (X immediately, LinkedIn +2h, Bluesky +4h, day 3 follow-up, day 7 retrospective, etc.).
Feed it a product, a launch date, and a goal (awareness / conversion / developer-focused). Edit any post before it’s scheduled.
Automations#
Event → action rules. When something happens in your stores or repos, Devflair can draft or schedule a post without you lifting a finger. Lives at /automations.
Events you can automate#
- App status change — WAITING_FOR_REVIEW, IN_REVIEW, READY_FOR_SALE, REJECTED
- New review received — with a rating filter (e.g. only 4–5★)
- Revenue milestone — $100, $500, $1k, $5k, $10k…
- Download milestone — 100, 1k, 10k, 100k…
- Featured by Apple — editorial placement detected
- GitHub release published
Per-event behavior#
For each rule you choose:
- Auto-draft — lands in Compose, you review and post manually.
- Auto-schedule — queued with a 30-min review window (cancel before it fires).
- Disabled — no automation for this event.
Use Auto-schedule for time-sensitive events (READY_FOR_SALE launches) and Auto-draft for everything else.
Post History & Analytics#
Every post Devflair sends is recorded. Reload at /history.
Reading your history#
Filter by product, platform, or source (manual / scheduled / api). Each row links out to the live post for verification.
Engagement analytics#
✦ team Devflair polls X and Bluesky at +1h, +24h, +7d to capture likes, reposts, replies, and impressions. Use this to learn what kinds of posts work for your audience — surfaced back in Compose as “Your top-performing patterns” suggestions.
Notification Emails#
Devflair sends transactional emails when something needs your attention.
- App status change — an app you track transitions to IN_REVIEW, READY_FOR_SALE, or REJECTED
- Scheduled post failure — a queued post couldn’t send (usually expired credentials)
- Billing events — payment failed, upcoming renewal, plan change
You can opt out of app status emails in Settings. Scheduled failures and billing alerts can’t be disabled — they’re required for account health.
Public API#
Devflair exposes a REST API for programmatic access — compose drafts, publish, schedule, manage products + post history. Full interactive reference at /docs/api.
Authentication#
Send Authorization: Bearer df_live_… on every request. Create a key at Settings → Developers — the full value is shown once at creation.
Rate limits#
- free — 100 requests/day
- solo — 1,000 requests/day
- ✦ team — 10,000 requests/day
Limits reset at 00:00 UTC. Responses include X-RateLimit-Limit, X-RateLimit-Remaining, and X-RateLimit-Reset headers.
Scopes#
Keys can optionally declare scopes. Empty = full access (default). Named scopes restrict what the key can do: read:*, write:projects, publish, schedule, compose, settings.
Not in v1 yet: App Store Connect, GitHub App, and Google Play integrations require browser session auth (cookies), not API keys. Use the web app for those flows. Tell us if you need them programmatically.
Full API reference
Browse every endpoint, required fields, and response shapes in the interactive reference.
Open API referenceImport / Export#
Your data is yours. Export everything as JSON at any time.
- Products + context
- Full post history with platform IDs
- Scheduled queue
- Automation rules
- Review response drafts
Request an export at webmaster@devflair.xyz. Self-serve export is on the Q4 2026 roadmap.
Feedback Engine#
The feedback bubble in the bottom-right of every page sends directly to the team. Bug reports and feature requests move the roadmap — check the public roadmap for shipping dates.
Plans & Pricing#
Three tiers. Everything compounds — Solo includes all of Free, Team includes all of Solo.
- 1 product
- BYOK AI (no included credits)
- ASO Suite (generate only)
- Compose + publish to 5 platforms
- Apps dashboard (read-only)
- Reviews dashboard
- Multi-device Screenshot Studio
- Public API — 100 req/day
- 3 products
- Claude Haiku included
- ASO push to stores
- Google Play + GitHub integrations
- Release Drafts
- Scheduling & calendar
- Automations
- Public API — 1k req/day
- 10 products
- Claude Sonnet included
- Cross-category integrations
- Campaign Studio
- Engagement analytics
- Custom webhooks (coming)
- Priority support
- Public API — 10k req/day
Annual plans save ~17%: Solo $190/yr, Team $290/yr. Upgrade/downgrade anytime from Settings → Billing.
Keyboard Shortcuts#
⌘ / Ctrl + EnterPublish from Compose⌘ / Ctrl + SSave draft⌘ / Ctrl + KQuick-find / jump to pageG then HGo to HomeG then AGo to AppsG then CGo to ComposeG then RGo to Reviews?Show all shortcuts